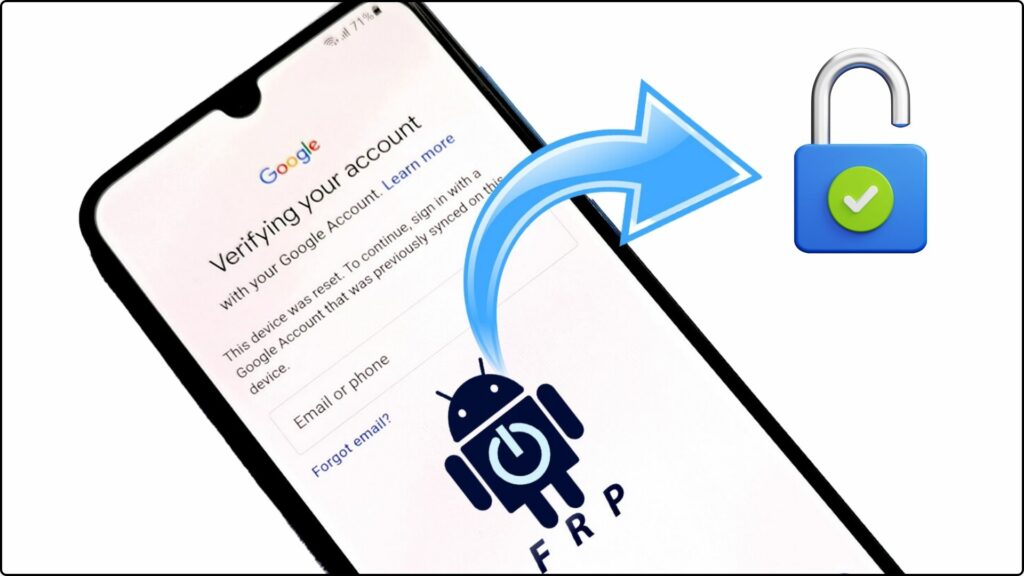
You just got your hands on a used or refurbished Motorola Moto G Pure only to find out the previous owner still has their Google account linked to the device. Now every time you turn on your phone, you’re prompted to enter credentials for their Google account before you can proceed, effectively locking you out from fully using your phone. Don’t worry, it’s a fairly easy process to get around this by bypassing the Google account verification.
Understanding Google Account Verification
When you set up an Android device, one of the steps is to add your Google account to the phone. This links your account details, apps, contacts, email, and more between your phone and Google’s servers.
It also sets up a verification system. Part of the verification requires entering the Google account password when rebooting the device. This prevents others from accessing your information if they get access to your phone when it’s powered off.
So in the case of buying a used Moto G Pure, the previous owner likely did not unlink their account before selling it. And now you need a way to use the device without access to their account. The good news is there are a few proven methods we’ll cover to bypass Google’s verification.
Also Read: Hard Reset the Samsung Galaxy Trend Plus S7580
Prerequisite Before Bypassing Account Verification
Before jumping into the step-by-step unlock guides, there are a few things you’ll want to check and prepare first:
- Charge the phone – Make sure to fully charge the device before attempting to unlock it. Some methods require the phone to be on for long durations. You don’t want the phone dying mid-unlock.
- Check device details – Note the specific phone model number, Android OS version, and other details. This will help match troubleshooting advice if you run into issues.
- Backup data – If the phone already has important data on it, be sure to backup that data before proceeding. The unlock process may erase files or require a factory reset.
- Understand the risks – While rare, understand an unsuccessful unlock attempt could fully brick the device. Only use official OS system images for your specific model when suggested in guides. Proceed at your own risk.
Also Read: How to Find and Connect with Friends on VSCO
Bypassing Google Verification with Special Key Combinations
The simplest bypass methods involve entering special key combinations when the verification screen appears. This takes advantage of Android’s recovery mode to force a factory reset.
Here are a few button combinations reportedly working to bypass Google verification:
- Volume Down + Power Button – With the phone powered off, hold down the Volume Down button and then continue to hold it as you press and hold the Power button. Continue holding both buttons until you feel a vibration, then release the buttons. This should boot into recovery mode where you can wipe data and reset.
- Volume Up + Power Button – Just like the prior method, only using Volume Up instead of Volume Down when combined with the Power button.
- Home Button + Volume Up + Power Button – On the verification screen, press and hold all three buttons together until you feel a vibration. Keep holding until the Android recovery menu appears.
The recovery menu should give basic options like applying system updates, wiping cache/data partitions, and rebooting into different modes. Try wiping data first, then reboot system. If it still boots right back into the verification, may need to reflash OS image – more details in the sections below.
Also Read: Using WPS to Connect your eero Eero Mesh WiFi System
Using ADB and Fastboot to Bypass Verification
ADB and Fastboot refer to the Android Debug Bridge and Fastboot debug interface built into the OS. They allow communicating with a device while in different modes and applying special commands like wiping data.
Here is an overview of the process:
- Install ADB and Fastboot tools on your Windows, Mac or Linux PC.
- Access recovery mode on your phone.
- Connect phone via USB to PC.
- Open command terminal and enter series of Fastboot commands to erase data.
- Reboot system without verification screen appearing.
Detailed steps:
Install ADB and Fastboot
You’ll first need to download the official Android SDK platform tools package from Google. This bundles together ADB, Fastboot, and other helper applications needed to manage Android devices.
- Download SDK Platform Tools for Windows / Mac / Linux
- Extract the zip file and make note of the path location
No additional setup steps should be required.
Access Recovery Mode
With your phone powered off:
- Press and hold the Volume Down button
- While still holding Volume Down, press and hold the Power button
- Keep both buttons held down until you feel a vibration and the recovery menu loads
- Use Volume buttons to scroll and Power button to select
If you entered recovery mode successfully, you should see a menu with a list of options to try like wipe data/factory reset, apply update from ADB, and other troubleshooting actions.
Connect Phone to PC
While phone is in recovery mode, connect a USB cable between your phone and computer. This allows the PC to detect and communicate with the device while in recovery mode.
- May need to swipe down on notification shade and tap the
USB charging this devicenotification. - Then change it to
Transfer filesmode to fully connect
Open Command Prompt/Terminal
On your computer, open a command line terminal:
- Windows: Launch the Command Prompt application
- Mac/Linux: Launch the Terminal application
This is where you’ll be entering the Fastboot commands.
Issue Fastboot Commands
Now communicate with your phone using the following Fastboot commands:
- Verify device detected:
fastboot devices - Flash boot/system images:
- fastboot flash boot
- fastboot flash system
- Wipe data partition: fastboot -w
- Reboot device: fastboot reboot
You’ll need to substitute the bracketed image file names for your exact device model number and Android OS version. If you don’t have these files, you can download official system images from Google’s Moto G Pure image repository.
Once complete, your phone should reboot normally without getting stuck on the verification screen. You may need to repeat certain steps if it still loops back to prompting the account login details.
Using Developer Options to Clear Verification
An alternate method to bypass verification relies on accessing the hidden Developer Options to wipe data:
- On the account verification screen after rebooting, tap
Forgot password? - On the next screen tap
07 times quickly - A popup will appear saying “You are now a developer!”
- Access the Developer Options under Settings
- Find the
OEM Unlockingoption and enable it - Return to the verification screen
- Hold down Power button til
Reboot to bootloaderappears - This enters Fastboot mode – connect USB and issue: Copy code
fastboot -w fastboot reboot - Phone should now boot without account verification
This takes advantage of the settings meant for app developers to tinker with more advanced Android functionality. By enabling then relocking the bootloader through Fastboot commands, it resets the data partition tied to that Google account.
Using Android File Transfer on PC
For Windows computers, a free tool called Android File Transfer enables accessing your phone’s storage directly. You can use this to manually delete account configuration files.
Here is a summary of the steps:
- Install and open Android File Transfer on your PC
- Enable USB debugging mode on your phone
- Connect phone to PC via USB
- Use Android File Transfer to navigate to data > system folder
- Delete these files:
- locksettings.db
- locksettings.db-shm
- locksettings.db-wal
- Also wipe data and cache partitions from recovery mode
- Reboot device
Without those locksettings database files, the account verification process should no longer fire up. This method keeps all your apps and data intact too.
Using Find Device Bypass
Google offers a “Find Device” web portal that links with enrolled Android devices. It’s meant to help locate lost phones. But the remote data wipe function can also reset account verification in some situations.
Here are the steps to try with Find Device:
- On a desktop web browser, go to android.com/find
- Login with the Google account currently linked on your phone
- Select your device details if presented
- Choose to erase data on the next screen
- When promoted on your phone, agree to wipe data
- Once wiped, reboot device
- Should now startup without verification
If you don’t know the account, try common usernames like test with default passwords like 1234 or input random sets of characters. There’s a chance it may link to an active account.
The wipe command gets delivered via Google’s servers rather than entering recovery modes. So can sometimes work when other methods are unsuccessful.
Using Hardware Methods
Up to this point, the bypass techniques have primarily relied on software and command line tools. There are also a couple hardware approaches that may remove Google account verification.
Reset Using Hardware Buttons
Some Motorola devices have a small pinhole along the edge/back panel. This approximately 3mm diameter hole provides access to the reset button hardware pin underneath.
You’ll need a SIM eject tool (or paperclip if absolutely necessary) to reach the reset button.
When powered on, press and hold this reset button for over 30 seconds using the tool. Feel for a short vibration confirming the device initiated a shutdown and reset sequence.
Upon rebooting, there should be no more account verification screen appearing. However, this may fully wipe all data and apps in the process.
Remove & Replace EFS Chip Partition
The EFS (Extended File System) partition contains credentials between hardware, OS, and linked accounts that enable certain DRM protections. Physically replacing this chip can essentially erase the associated account details.
However, tampering with internal hardware risks irreparably damaging components if done improperly. Unless you have professional microsoldering skills and tools, I advise avoiding this method as a last resort. There’s simply too much risk of bricking your device.
The Bottom Line
As you can hopefully tell, while moderately complex, there are numerous options to bypass pesky Google account verification blocking you from using your Moto G Pure:
- Key Combinations – Erase data from recovery menu
- ADB/Fastboot – Remotely wipe data using Android SDK tools
- Developer Options + OEM Unlock – Developer settings data wipe
- Android File Transfer – Manually delete account database files from PC file explorer app
- Find Device Portal – Remote wipe phone via Google’s tracking site
- Hardware Factory Reset Pinhole – Long press tiny reset button hole to wipe
I suggest trying the key combo methods first, then ADB and Fastboot if necessary. Only attempt hardware approaches if comfortable and understand all risks.
And going forward, best to confirm used Android devices are correctly factory reset before purchasing. That’ll avoid starting off your ownership unable to fully use it!
I hope this step-by-step guide helps successfully get you into your Moto G Pure. Let me know if you have any other questions bypassing the pesky Google verification that I can assist with!
Frequently Asked Questions (FAQ)
If you enter incorrect passwords multiple times on the verification screen, the phone will lock itself from further attempts for an increasing duration. After a set number of failed attempts, the device could even factory reset itself, wiping all local data.
Performing a factory reset on carrier-locked phones before entering valid SIM credentials can disable all cellular connectivity. You’ll need to contact your mobile provider to obtain the network unlock code to fully activate service capabilities.
Wiping data partitions or flashing OS images during the bypass process can cause apps relying on those old config files to force close or crash. Try clearing app cache/data individually for the affected apps. You may need to reinstall the apps from scratch as well.
Yes, after properly bypassing the old linked account, you should be able to setup the device with your own personal or work Google accounts without limitations.
Unfortunately once you bypass the previous account verification, you lose access to any synced data like emails, contacts, documents, etc tied to their Google account and device profile. The only way would be asking the prior owner for credential access.
Absolutely! As long as you factory reset it yourself after completing the bypass steps, the next owner will be able set up the device fresh with their own account details. No verification issues will pass on during your sale.